Way before the Lego flowers and crocheted bouquets became Instagram sensations, there was a trend that blossomed in kitchens all around the world: garden focaccia bread art. Delicate flower petals crafted from cherry tomatoes, vibrant hues of herbs and olives, all arranged atop a bed of golden-brown bread.
Dee-licious!
And so, inspired by our New Year’s resolution to try new things, we decided to dive into the world of bread-making, and attempt our very own homemade focaccia bread!
About this Recipe
We stumbled upon a nice rosemary focaccia bread recipe on Gimme Some Oven, but decided to put our own spin on it by modifying the recipe to yield a slightly smaller portion, and adding even more delectable toppings.
About this Focaccia Bread
This focaccia bread is perfectly soft and fluffy. It’s topped with lots of fresh herbs, tomatoes and olives, crunchy, flaky sea salt, and a drizzle of olive oil.
It’s so easy to make, especially with the help of a stand mixer. It also happens to be naturally vegan. And best of all, it’s just the ultimate cozy carbohydrate comfort food.
And if it’s your first time working with yeast in bread, please don’t let that deter you from making focaccia! This recipe is a great place to begin when working with yeast.
So what are we waiting for? Let’s make some focaccia bread!
Ingredients
For the yeast:
2 cups of lukewarm water
3 teaspoons of sugar
9 teaspoons of active-dry yeast
For the dough:
5 ¼ cups of all purpose flour
3 teaspoon flaky sea salt
6 tablespoons of extra virgin olive oil
For the toppings:
Extra virgin olive oil for drizzling
Flaky sea salt for sprinkling
Cherry tomatoes
Green or black olives
Fresh rosemary
Fresh thyme
Fresh basil

Instructions
Prepare the flour mixture:
1. Add flour and salt in a bowl.
2. Stir to combine.
Proof the yeast:
1. Add lukewarm water and sugar to another small bowl.
2. Stir to combine.
3. Sprinkle the yeast on top of the water.
4. Give the yeast a quick stir to mix it in with the water and sugar.
5. Let it sit for 5 to 10 minutes until the yeast is foamy.
Knead the dough:
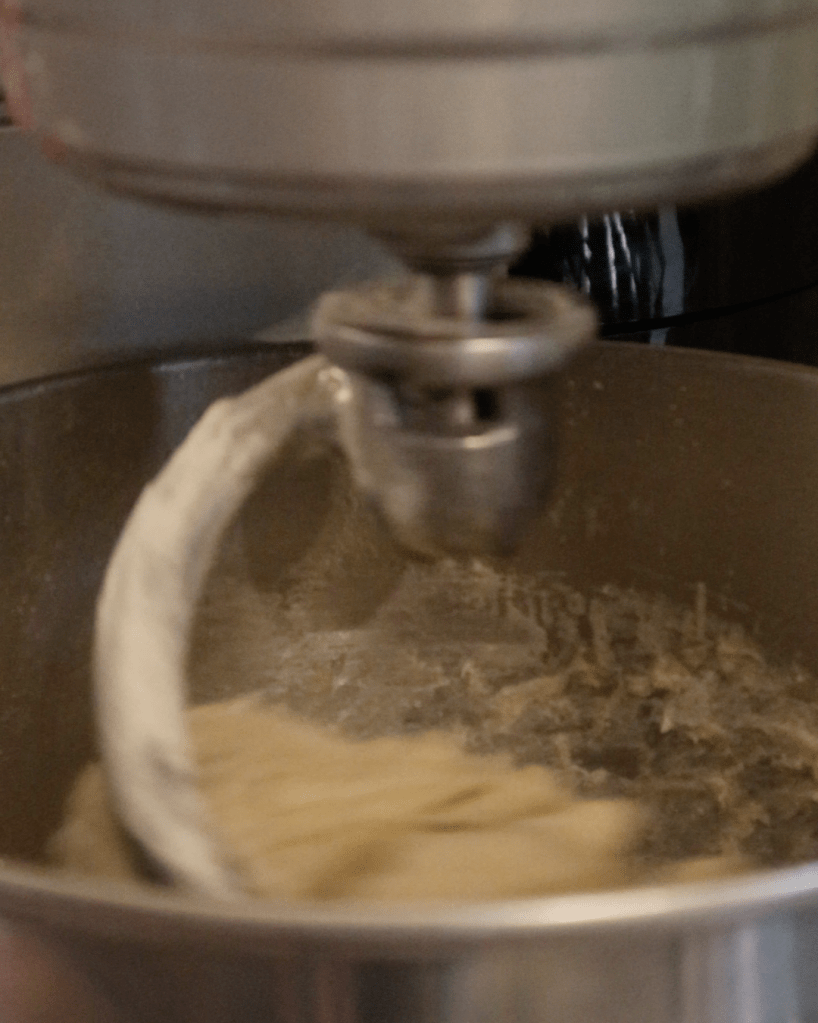
1. Set the mixer to low speed, and gradually add the flour mixture and olive oil.
2. Increase the speed to medium-low, and continue mixing the dough for 5 minutes.
3. If the dough is too sticky and isn’t pulling away from the sides of the bowl, add in an extra ⅛ cup flour while it is mixing.
First dough rise:
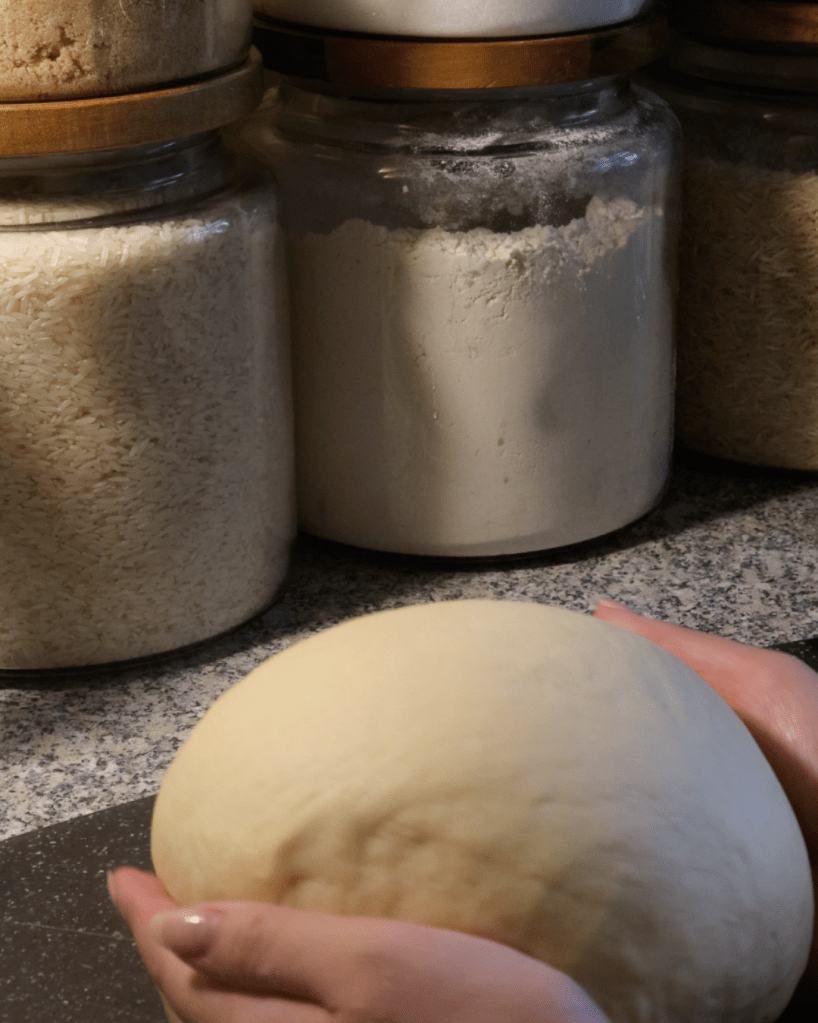
1. Remove the dough from the mixing bowl, and use your hands to shape it into a ball.
2. Grease the mixing bowl with olive oil or cooking spray.
3. Place the dough ball back in the bowl and cover it with a damp towel.
4. Place in a warm location and let the dough rise for 45 minutes to 1 hour, or until it has nearly doubled in size.
Second dough rise:
1. Turn the dough onto a floured surface.
2. Roll it out into a large rectangular shape until that the dough is about ½ inch thick.
3. Cover the dough again with the damp towel, and let the dough continue to rise for another 20 minutes.
Decorate the dough:
1. Preheat the oven to 400°F.
2. Transfer the dough to a large parchment-covered baking sheet.
3. Use your fingers to poke deep dents all over the surface of the dough. Seriously, poke all the way down to the baking sheet!
4. Drizzle a tablespoon or two of olive oil evenly all over the top of the dough
5. Sprinkle evenly with the fresh herbs, cherry tomatoes and olives, and sea salt.
Bake the bread:
1. Bake for 20 to 30 minutes, or until the dough is slightly golden and cooked through.
Serve the bread:
1. Remove the bread from the oven.
2. Drizzle with a little more olive oil if desired.
3. Slice and serve warm.
How It Went
Deciding to make two loaves (one for each of us) was an easy choice. The recipe above yields one bread, but we wanted to cater to our individual tastes.
One focaccia bread was adorned simply with olive oil, rosemary and basil: a classic, simple combination. The other was a masterpiece of abundance: loaded with all the herbs, olives, tomatoes, and a generous drizzle of olive oil. And if you know which Lalic sister is the pickier eater, you can probably guess whose focaccia is whose.
Now while we’re not quite Chef Ramsay-level in the kitchen, we’ve had our fair shares of cooking and baking adventures. (You’ll find some of our other yummy recipes here!) But bread-making was definitely uncharted territory for us. So naturally, we encountered a few hiccups along the way.
For one, our breads didn’t come out as golden as we would’ve wanted them to. Perhaps we got a little too excited and took the bread out too early. Or maybe our oven needed to be set a little higher. And two, our flower art (or flower art on one bread and greenery art on the other) didn’t quite match the vision we had in mind. But you know what? Despite the bumps along the way, our focaccia breads turned out surprisingly well!
Now, we’re excited to share a glimpse into our bread-making experience, along with some tips and tricks we picked up along the way.
1. Prep your toppings after you finish kneading your dough
Don’t make the same mistake we did and prep all your herbs and fruits (yes, tomatoes and olives are both fruits!) in advance. Instead, take advantage of the hour-long dough rising period, and take this time to meticulously prep your toppings and even tackle some dishwashing.
2. Make sure you don’t pour the sugar into the flour mixture
Oh, we almost wasted five cups of flour because of this one!
While many baking recipes instruct you to combine all the dry ingredients together, it’s important not to pour the sugar into the salt and flour mixture. Instead, the sugar needs to be dissolved in water to activate the yeast.
3. Let the mixer do the workout
This is one of those recipes where it’s actually okay to be lazy. Consider using a mixer for kneading the dough. We did! It’s faster and saves your hands from unnecessary strain. But if you enjoy the traditional method and a bit of a workout, kneading by hand works just as well.
4. Sugar, or honey, honey!
If you don’t have sugar at home or just prefer other alternatives, you can also use honey or agave. Then top your focaccia bread off with some prosciutto and slices of peaches or plums for a delightful, sweet and savoury twist!
5. Your sea salt doesn’t have to be flaky
If you don’t have flaky sea salt at home, don’t worry. While flaky sea salt does add a nice texture, you can use fine salt as well, and we promise your focaccia bread will taste just as good. Just sprinkle a little less than you typically would to avoid making your focaccia bread too salty.
6. Baking pans or baking sheets?
We decided to bake our rosemary-and-basil-only bread on a baking pan and the other on a baking sheet, as we only had one of each at home. And here’s our verdict: opt for a sheet instead of a pan to prevent the bread from becoming too thick. However, if you’re planning to use your focaccia bread for sandwiches, you might actually prefer the thicker version!

7. Warmth is key for perfect dough rising
Make sure your dough rises in a warm spot, like by a sunny window, to encourage proper fermentation and a light, airy texture. If your dough doesn’t rise properly, you might bake a brick! And if there’s not too much sun where you are, you can use our trick and leave your bowl of dough in a closed room with a small portable heater set on low.
8. Turn your homemade bread into homemade croutons
When you get tired of eating focaccia every day or find that it isn’t as fluffy or fresh as it once was, don’t let it go to waste! Transform it into delicious salad croutons by cutting it into cubes, drizzling with olive oil, garlic powder, salt and pepper, and then baking at 225°F for 1.5 hours, until golden and crispy.
9. Go all out with the toppings!
Don’t be shy with toppings! We held back a bit with the all-dressed bread, thinking there might be too many toppings. But now we realize, we should’ve created a big bouquet of flower designs. Remember, the dough expands as it bakes and the toppings shrink, so those flower designs get much, much smaller.
For extra flair, you can also add more toppings like red onions and colourful bell peppers.

So there you have it! We tried making focaccia bread, and it went… pretty well! And while there may have been little bumps along the way, the experience of trying something new in the kitchen was rewarding in itself.
Now, how about you? When was the last time you tried something for the first time?
Whether it’s experimenting with a new recipe or picking up a new hobby, embracing new experiences keeps life exciting and helps us grow. So go ahead, take that leap, and see where it leads you!
Who knows, you might just discover a new passion or talent along the way…
